12/26/11

Newest pictures - taken 11-21

I'll admit right now that I probably will not be taking pictures of the chickens very regularly anymore. For one thing they don't change a whole lot at this point. Also they don't exactly pose and being next to my feet isn't really an ideal photo op.

First of all I wanted to share this picture of the ramp that Jake made. He didn't make 100% of it but we had this old board (used to be the sides of the part of a grain truck where the grain goes) and he helped me cut those strips (from some old molding or something) and then he nailed the strips on for treads. He did a great job. You can also see, in the foreground, that Cosmo is doing "the dance" to a hen but I made him stop. I read that it's a good idea not to allow them to jump the hens when a human is close by because of dominance or something. I just went near him and he quit. Also you can see my "alien hat" on the waterer. This is made from a flowerpot, a funnel, and many yards of foil tape and is to keep the chickens from roosting on top of the waterer. It just sits on top and even the wind doesn't blow it off, so it's easy to take off when I need to fill the water. And yes, the water looks gross. I refilled it and cleaned it out right after this but they pretty much fling dirt in there within 5 minutes after I put the cleaned out waterer in the pen.


And the rest of the pics:


11/21/11

Chickens - August 4th and 16th and October 2nd

I haven't done a good job of posting these regularly. So here are some pictures from the last 3 times I took pics. I have not taken any since October 2nd so I really need to do that. The problem is that when I go in the run, they think I have treats so they come running over and hover around my feet. Not a good way to get a pic. So my best option is to throw some scratch in and take pics through the fence. Because if I'm in there, even if I throw food down, they are back to me within seconds. Apparently they think I'm throwing the icky stuff and holding out on the good stuff.

pics from August 4th


pics from August 16th


pics from October 2nd


10/3/11

My new coop-finished!!

The new coop is done!! These are pictures of the progress (sort of-I didn't take pics that often). We started it somewhere around the end of August and finished it and put it in place on October 2nd. It took longer than we had hoped because my husband has been pretty busy getting ready to harvest crops. So anyway here goes:
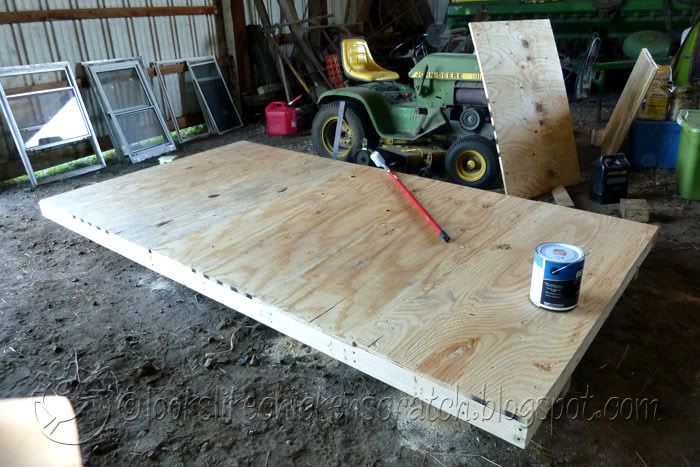
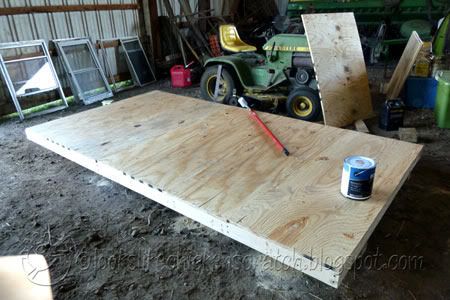
August 29th-the floor. I took this right before I painted it.

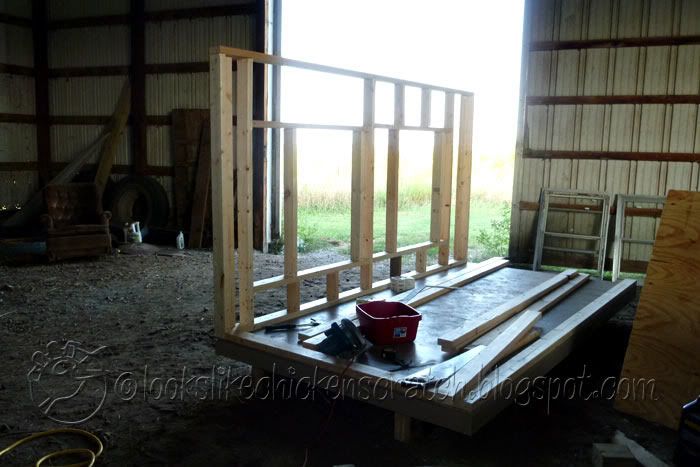
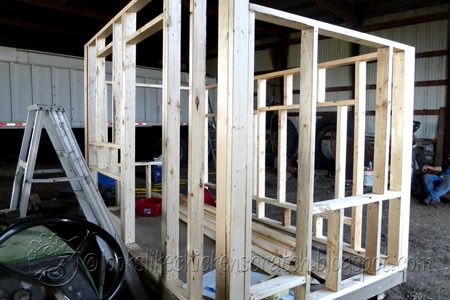
August 31st-the first wall starts going up


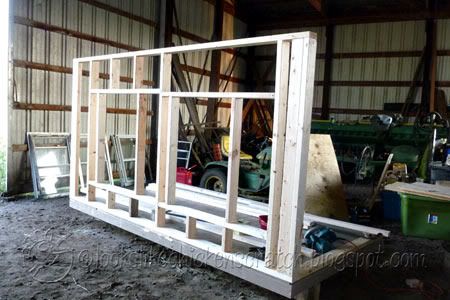
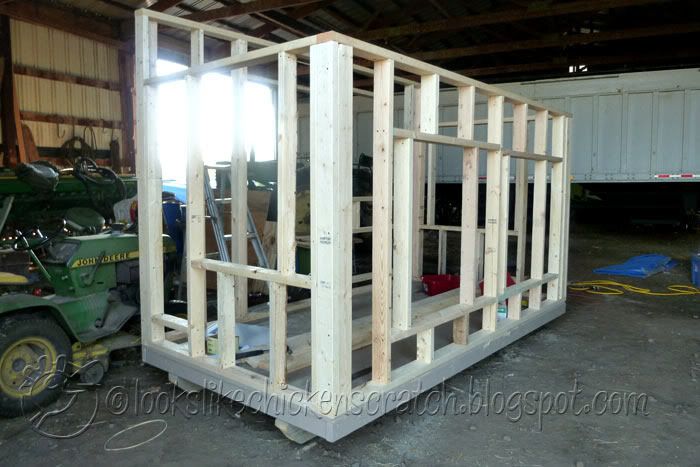
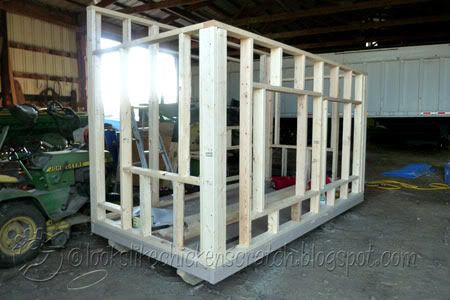
September 2nd-the walls are up! Minus siding. I'm getting excited now


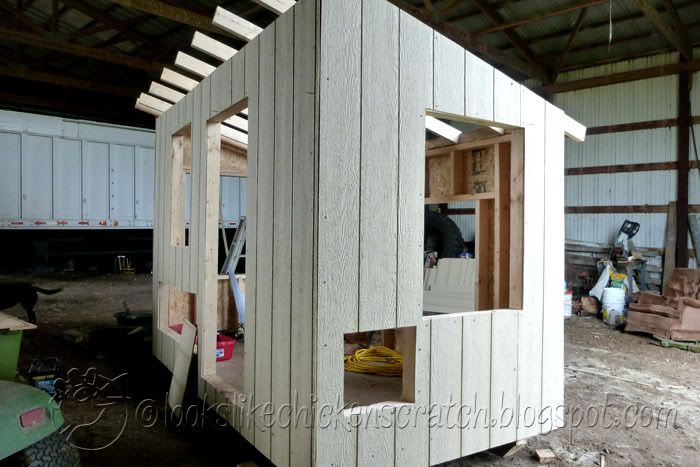
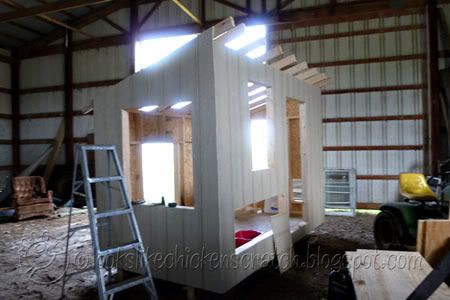
September 10th - the siding is done. Roof joists too.


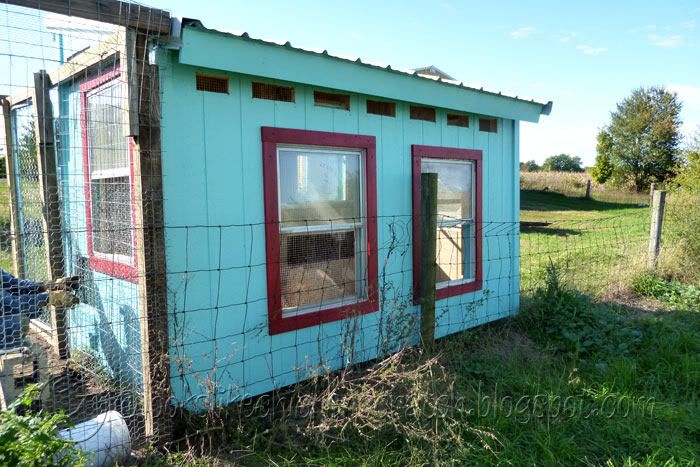
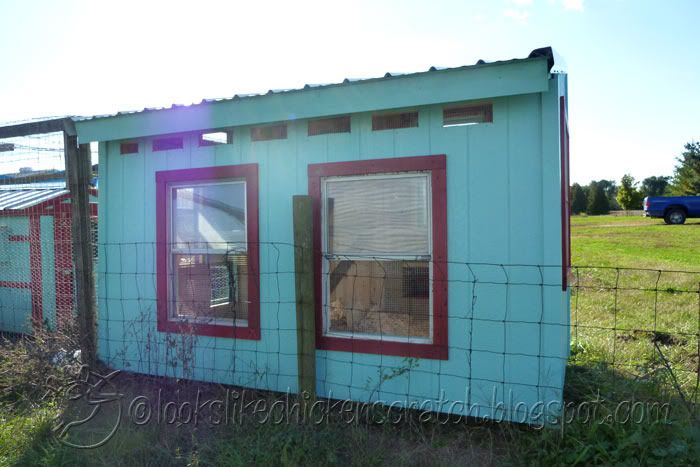
October 2nd-it's done!! (I did take some pics between the last ones and these but they don't look very different-we mostly worked on the inside and the nest boxes during that time). As you can see from the pics above, we built it in the shed so that we would be close to the electricity and also so that we could work on it in rainy or windy weather. When it was finished my husband used the tractor to drag, and then push, it in place.

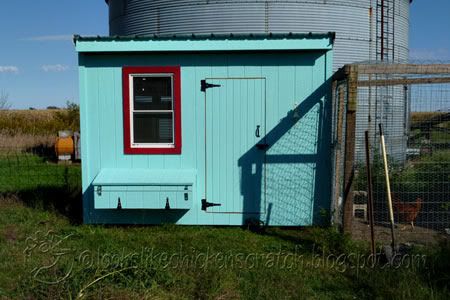
In the picture below you can see the old coop in the background-that will be taken out as soon as my husband has a chance to do it. We have to remove the fencing on that end of the run to get it out.

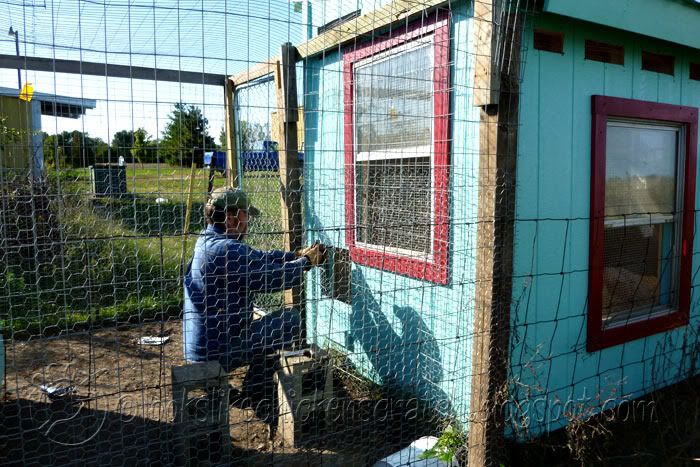
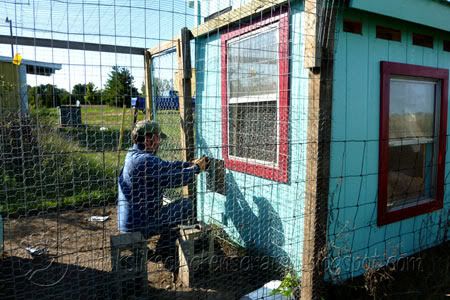
This shows the ventilation on the east side. We will make removable/hinged covers for super bad weather. Either a couple of wooden doors or some heavy canvas. There is a fence there but I can reach over it easily to open and close the windows-the windows on this side and the west side open from outside, so we just stapled hardware cloth to the openings on the inside. You can see my hubby's hand cutting the wire for the pop door.


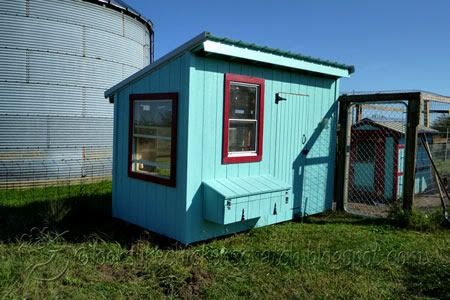
A better pic of my carpenter. He does not like building things much so this was totally a labor of love for him. There is more ventilation up above on this side but it's hard to see. It's behind that top beam but it's a few inches away from it, so it isn't obstructed. I can also open the windows a bit from the top to add more up-high vents and we may add some to the other two walls if needed.

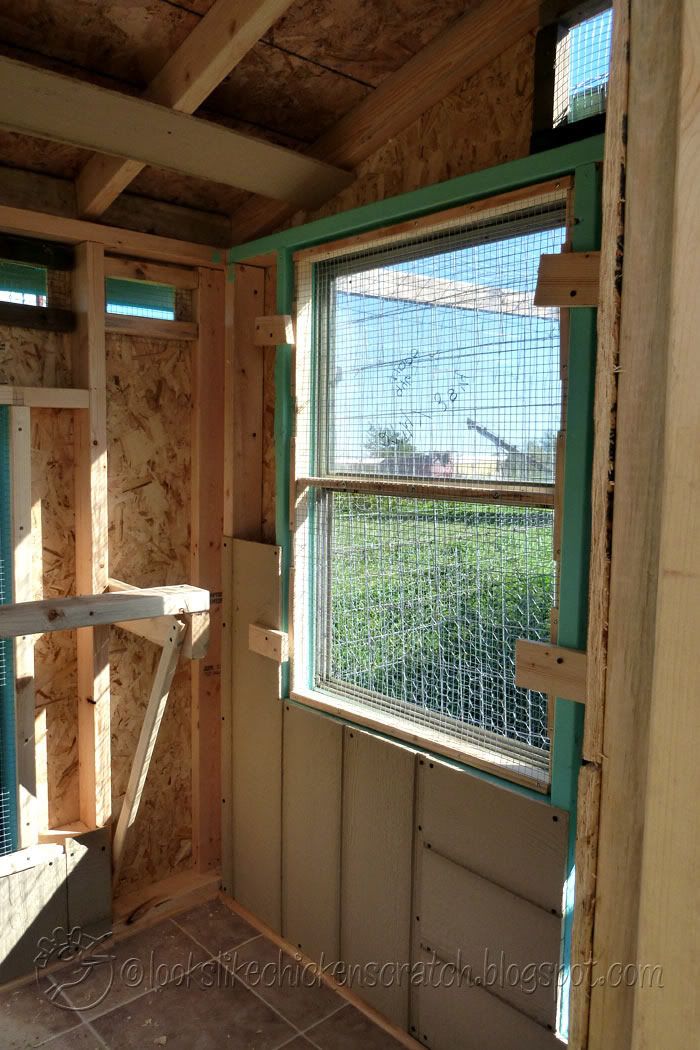
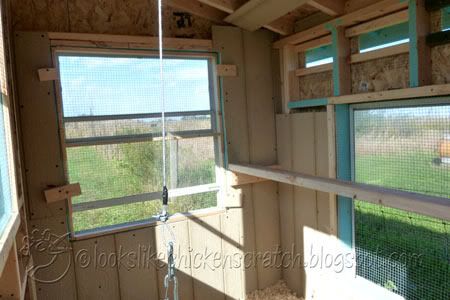
Interior pics. We used leftover siding to cover up some of the studs. We didn't have enough to cover all of them, and the north wall has styrofoam insulation in between the studs. This is the north wall. This window opens from the inside so I made removable screens for it. The roost is on the right. Oh I also started painting the inside but decided not to since I would have had to buy another gallon of paint plus I was running out of time and hand strength (I have carpal tunnel syndrome).

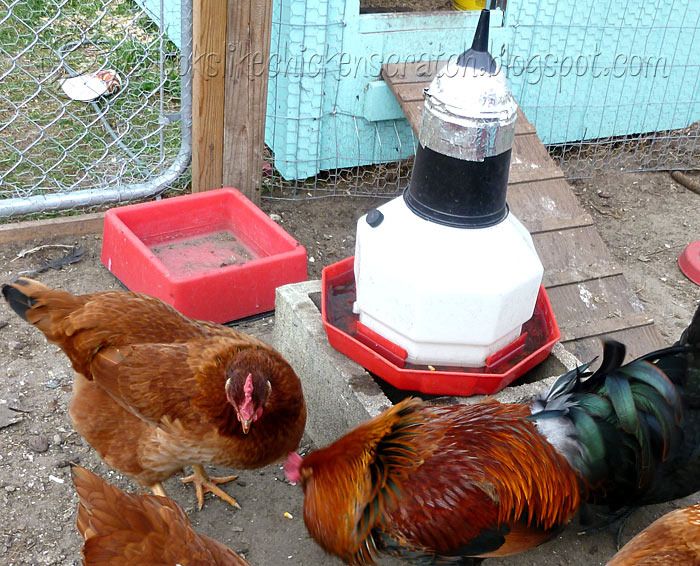
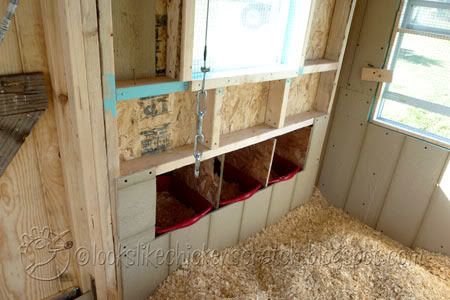
This cable is for hanging the feeder. Nest boxes in the background.

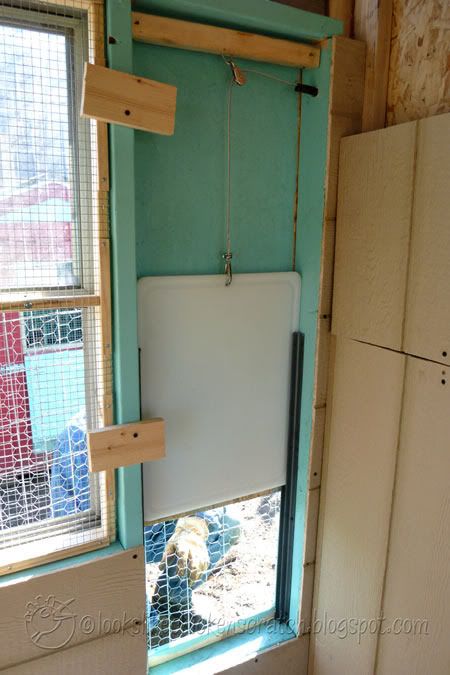
The pop door. It's made of a cutting board and can be opened and closed from outside the coop. This is the south wall and it also has a window only openable from the inside so it also has a removable screen. You can see my hubby outside the pop door, cutting the wire so the chooks will fit through...

The south end again. Obviously the inside siding is a patchwork of leftovers...

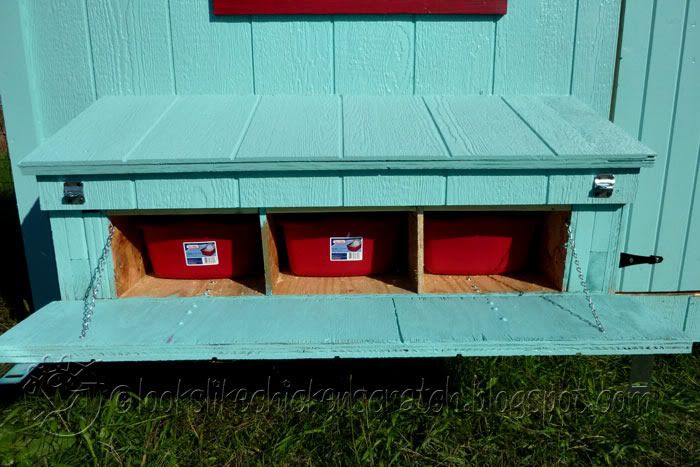
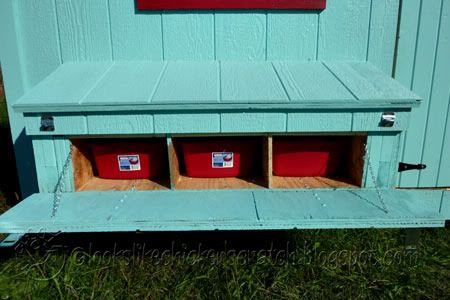
The nest boxes. The tubs slide out. I put two hasps on it..just to be safe.

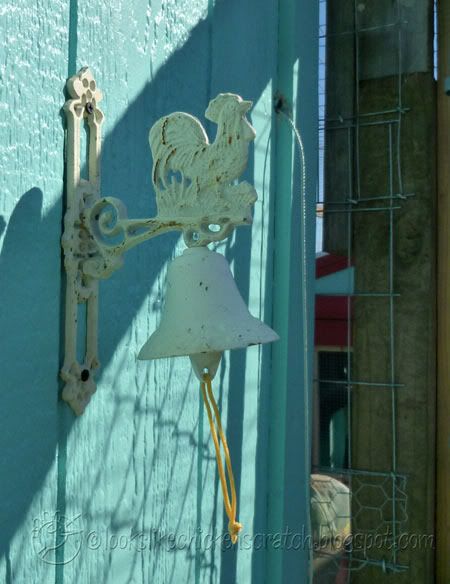
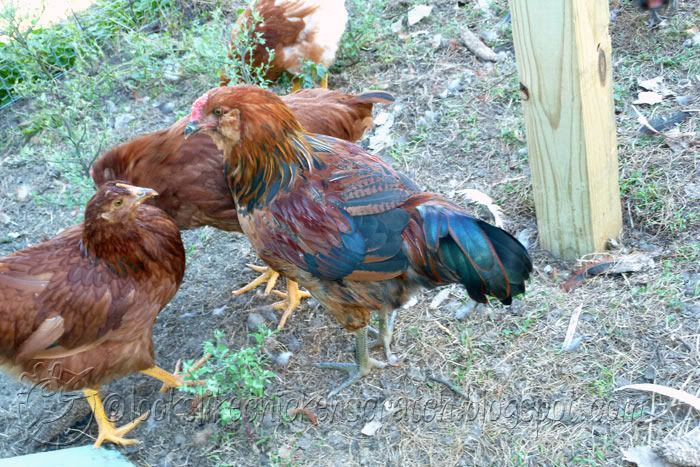
The rooster bell I got from ebay. Cheap! I may have to move it. I hit my head on it twice today coming out of the run (the run door is on the right side of the post in this picture). You can also see the cable that opens and closes the pop door in this pic.

9/1/11

deep litter vs sand

I know there are definite camps for both sides. I have sand in the coop now. The only reason we used it is because this coop isn't built for deep litter. I did a lot of research even before ordering our chickens before deciding on deep litter, but when we got the premade coop, I had to change my plans. I know that sand is probably cheaper but I have zero desire to scoop it daily. It is way too dusty and with my carpal tunnel syndrome, a 5 minute job takes about 30 minutes. I simply cannot scoop a 50 sq foot area every day or even every week (once we get the new coop built).

If we use deep litter, we can change it out a few times a year and the main thing-my husband will do it. He doesn't want to scoop poop out of sand either and I don't want him to since he would not bother to use a dust mask. But he is perfectly willing to change wood shavings a couple of times a year (and might even use a dust mask since it's not a daily or weekly job) and to buy them too (he delivers feed for one of the local feed stores during the off seasons so he's there just about every day anyway) and it's cheap for us to buy. I've seen all the arguments for both sides and I think both methods are probably very good. For us, sand has been fairly clean and smell-free but not less labor and I have a lot of trouble scooping. I've tried kitty litter scoops, long handled scoops, and horse scoops with wire on them, and they are all difficult for me to use. I get claustrophobic with the dust mask on too.

So for us, I think deep litter will be the way to go-at least for a try. If we hate it we can go back to sand but to tell the truth, I hate the sand because of the work. I'm in pain for about half a day after scooping (this is with daily or every 3rd day scooping so it's not like I'm waiting until it's a huge job) and I'm ready for that to end. :)